
Running out of storage space doesn’t have to mean expensive furniture or crowded rooms. DIY wall shelves are a budget-friendly, stylish solution that can help you organize your home while adding personality to your walls. Plus, they’re easier to make than you might think—even for beginners!
In this guide, we’ll walk you through creating your own wall shelves step by step, with tips to make them sturdy, functional, and beautiful.
Plan Your Shelf Design
Before picking up tools, it’s important to plan your shelves.
Ask yourself:
- What do I want to store or display? (Books, plants, decor)
- How much weight will the shelves need to hold?
- What style do I want? (Floating, rustic, industrial, minimalist)
Tips for planning:
- Sketch your wall and shelf layout
- Measure available space carefully
- Choose shelf lengths that suit both function and aesthetics
Planning first makes installation easier and ensures your shelves look intentional.
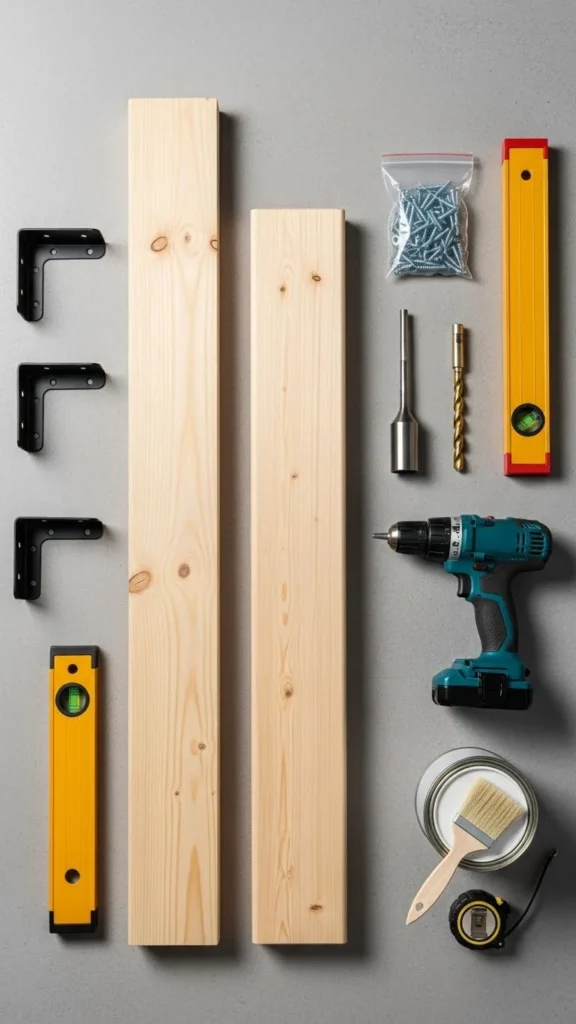
Gather Materials and Tools
The right materials make all the difference. You don’t need anything fancy—just durable and affordable.
Materials:
- Wood boards (reclaimed wood works great!)
- Brackets (or floating shelf hardware)
- Screws and wall anchors
- Sandpaper
- Paint or stain (optional)
- Level
Tools:
- Drill and drill bits
- Screwdriver
- Measuring tape
- Pencil
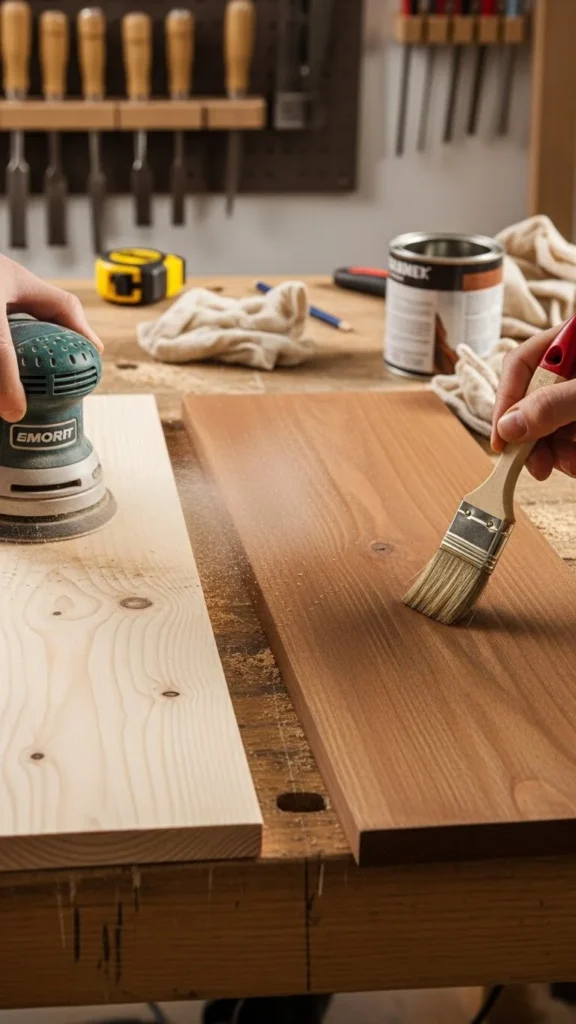
Prep and Finish Your Shelves
A little prep makes shelves safer and prettier.
Steps:
- Sand the boards to smooth rough edges.
- Wipe down dust before painting or staining.
- Apply paint or stain for color and protection.
- Let them dry completely before installation.
Tip:
A light finish on raw wood creates a modern, natural look while protecting the boards from wear.
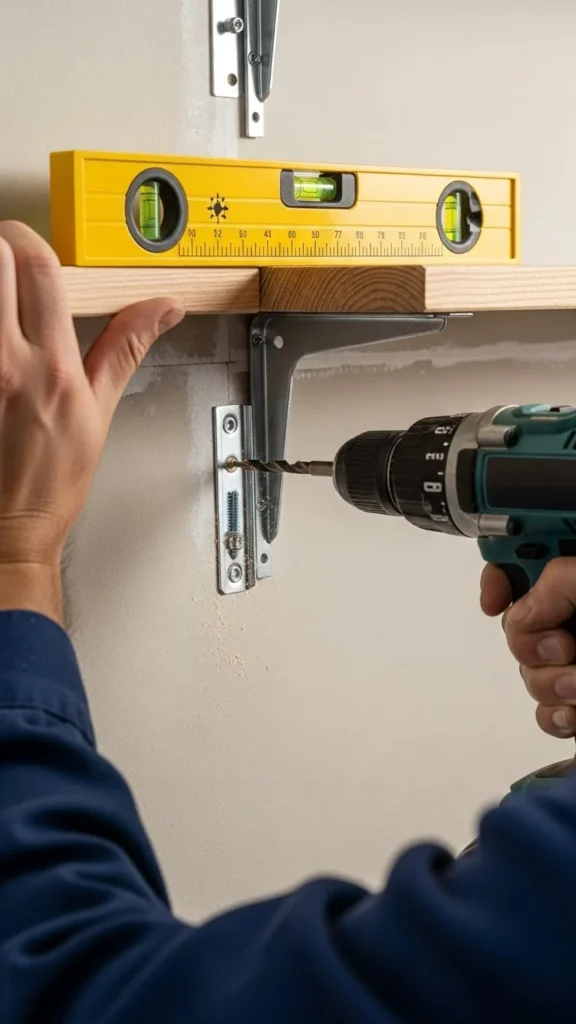
Install Brackets or Floating Hardware
Depending on your design, use brackets for visible support or floating hardware for a sleek look.
Steps for bracket shelves:
- Use a level to mark where brackets go.
- Drill pilot holes and install anchors if needed.
- Screw brackets into the wall.
- Place the shelf on top and secure with screws.
Steps for floating shelves:
- Follow the manufacturer’s instructions carefully.
- Make sure the mounting points are secured to studs for strength.
- Slide the shelf onto the brackets until snug.
Tip:
Always use a level to keep shelves straight—it makes a huge difference visually.
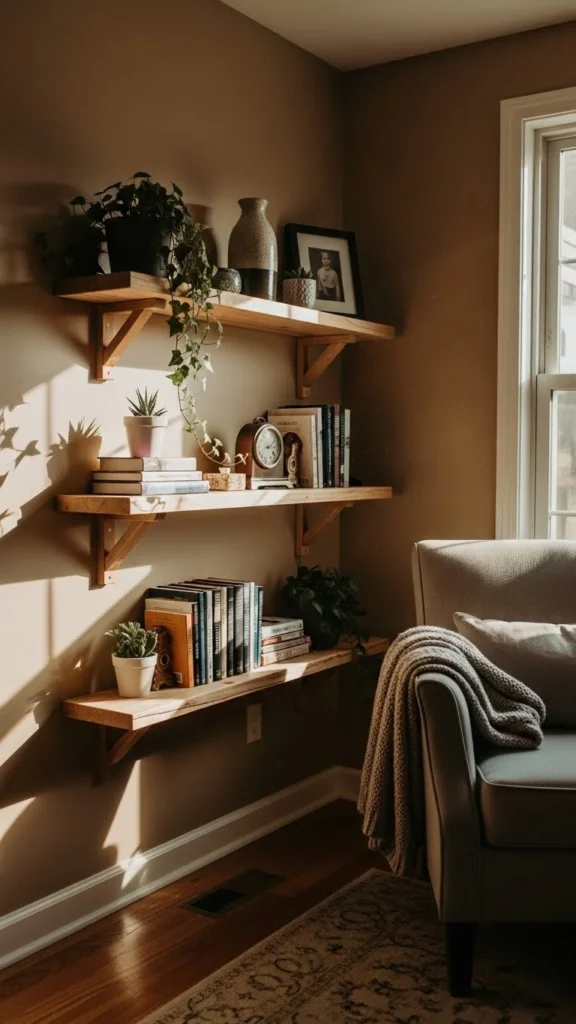
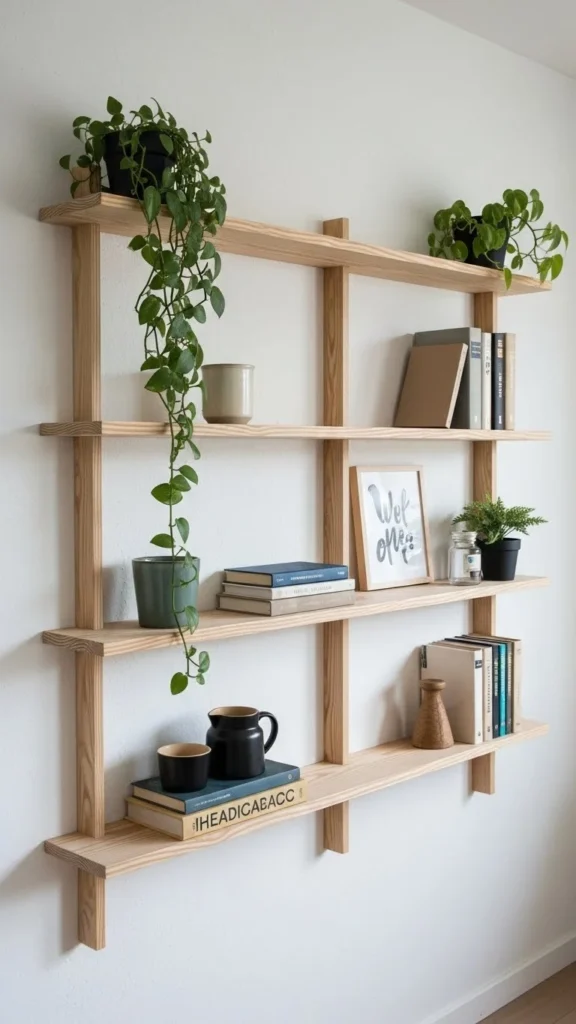
Arrange and Style Your Shelves
Once installed, your shelves are ready for styling.
Ideas for arranging items:
- Books stacked vertically and horizontally
- Small potted plants for greenery
- Decorative objects like vases, candles, or frames
- Storage baskets for smaller items
Tips:
- Vary heights and textures for visual interest
- Don’t overcrowd—leave breathing room
- Rotate decor seasonally to refresh the look
Safety and Weight Tips
Even beautiful shelves need to be safe.
- Always use wall anchors if screws aren’t going into studs.
- Don’t overload shelves—check weight limits.
- For floating shelves, heavier items should be placed closer to the wall.
Final Thoughts: Stylish Storage on a Budget
DIY wall shelves are one of the easiest ways to add storage, style, and personality to your home without spending a fortune. With some basic materials, a little planning, and your creativity, you can transform empty walls into functional focal points.
✨ Save this guide for later and start building your own budget-friendly wall shelves today!
Leave a Reply