
You finally find the perfect frames, choose photos you love… and then they sit on the floor for weeks because hanging them feels intimidating. Crooked lines, too many holes, awkward spacing—it’s enough to make anyone procrastinate. The good news? Hanging picture frames perfectly is a skill you can absolutely master with a simple system.

Whether you’re hanging one statement piece or creating a full gallery wall, this guide will help you get clean, balanced results every single time.
Start With a Clear Plan (Don’t Skip This)
Most hanging mistakes happen before the first nail goes in. Planning saves holes—and stress.
Before you hang anything:
- Decide if you want symmetrical or organic spacing
- Choose portrait, landscape, or mixed orientations
- Pick a focal point (center frame or largest piece)
For gallery walls, lay everything out on the floor first. This lets you experiment without commitment.
Rule of thumb: If it looks good on the floor, it’ll look good on the wall.
Find the Perfect Height (The Golden Rule)
This is where many people go wrong. Frames hung too high make rooms feel awkward and disconnected.
Ideal hanging height:
- Center of the frame should sit 57–60 inches from the floor
- This aligns with average eye level
For furniture like sofas, consoles, or beds:
- Hang frames 6–8 inches above the furniture
- Keep the spacing consistent across pieces
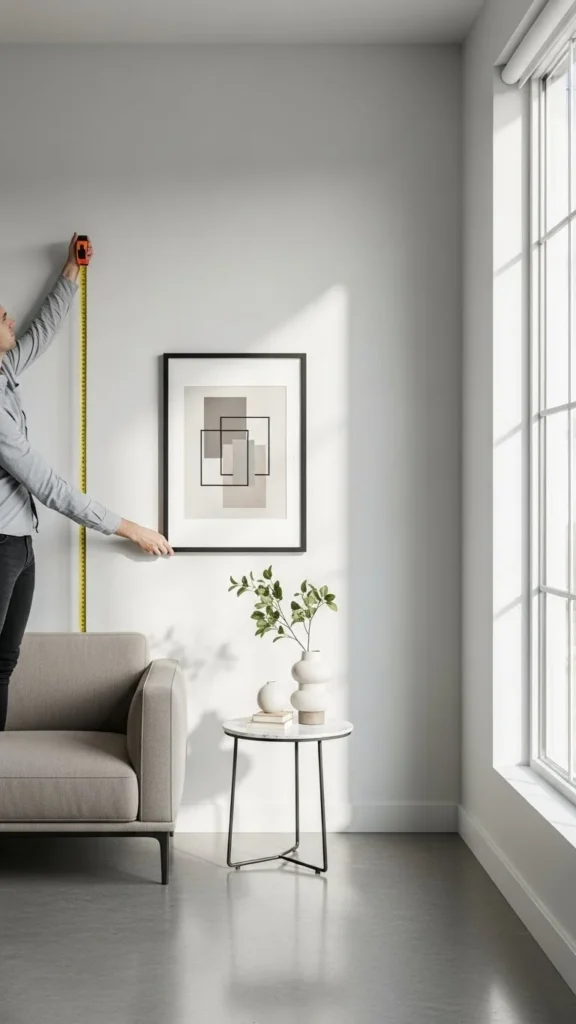
Consistency is what makes walls feel professionally styled.
Measure and Mark Like a Pro
Eyeballing is tempting—but measuring is your best friend.
What you’ll need:
- Measuring tape
- Pencil
- Level
- Painter’s tape (optional but helpful)
How to mark correctly:
- Measure frame height
- Find the hanging hardware position on the back
- Mark the nail point on the wall—not the top of the frame
- Double-check with a level
Painter’s tape can help visualize placement without leaving marks.
Use Templates for Gallery Walls
Gallery walls feel tricky because spacing matters more than perfection.
Easy template trick:
- Trace each frame onto paper or cardboard
- Cut them out
- Tape the templates to the wall
This lets you adjust spacing and alignment before committing.
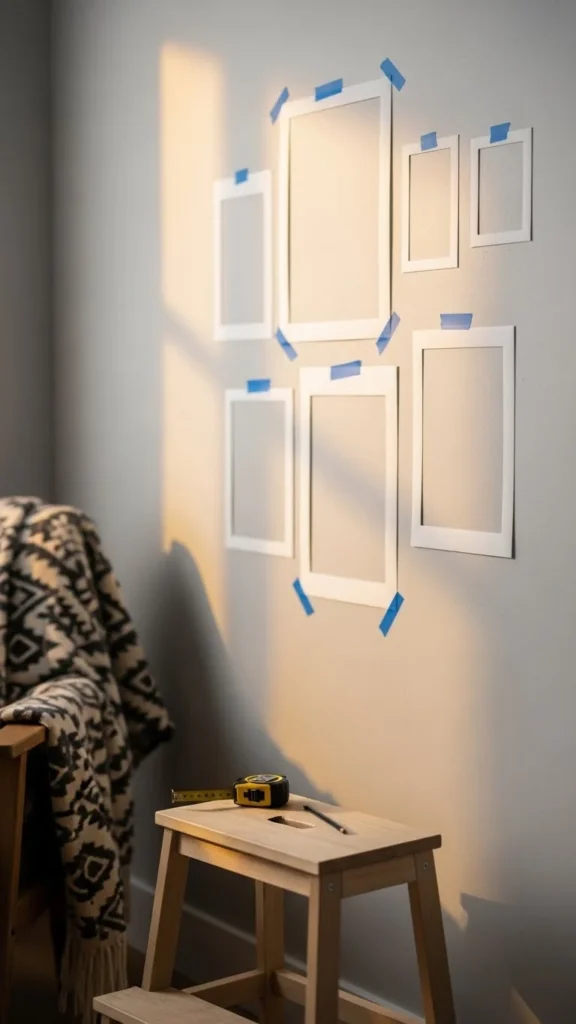
Aim for 2–3 inches between frames for a clean, balanced look.
Choose the Right Hardware for Your Wall
Using the wrong hardware is a recipe for tilted or fallen frames.
Match hardware to weight:
- Light frames: Picture hooks or adhesive strips
- Medium frames: Nails or wall hooks
- Heavy frames: Anchors or wall plugs
If you’re renting, removable adhesive hooks can work well—just check weight limits.
Pro tip: Two hooks spaced evenly keep wider frames from tilting.
Hang, Level, Adjust—Then Step Back
Once the frame is on the wall, don’t rush away.
Final check:
- Use a level to straighten
- Adjust gently until centered
- Step back several feet to view it
Sometimes what looks straight up close needs a tiny tweak from a distance.
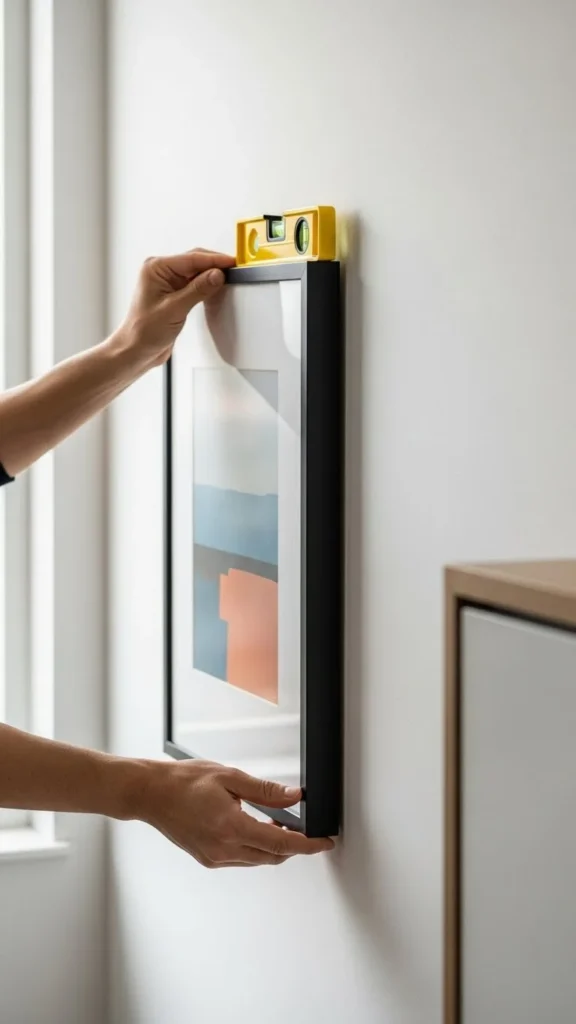
Trust your eyes—but verify with tools.
Special Tips for Different Wall Types
Not all walls behave the same way.
For tricky situations:
- Staircase walls: Follow the angle of the stairs
- Hallways: Keep frames at eye level for walking views
- Large walls: Use one oversized piece or a wide gallery
- Small walls: One centered frame often works best
In tight spaces, vertical arrangements can make ceilings feel taller.
Common Picture-Hanging Mistakes to Avoid
Avoid these and you’ll instantly look more polished:
- Hanging frames too high
- Ignoring furniture alignment
- Uneven spacing
- Mixing styles without intention
- Rushing without measuring
Remember: holes are easy—fixing them is not.
Final Thoughts: Confidence Comes With a System
Hanging picture frames perfectly isn’t about talent—it’s about having a repeatable method. Once you understand height, spacing, and planning, you’ll stop second-guessing yourself and start styling with confidence.
✨ Your next move: Choose one wall and hang just one frame today.
📌 Save this guide for later so your walls always look intentional and polished!

Leave a Reply