
A wall filled with photos can do more than just look pretty. It can make you pause, smile, and remember moments that matter. When done thoughtfully, photo walls feel personal, layered, and meaningful—not cluttered or random.
If you’ve ever printed photos and then felt stuck on how to display them, this guide will help. We’ll walk through how to decorate walls with photos in a way that tells a clear story and feels intentional from start to finish.
Start With the Story You Want to Tell
Before choosing frames or layouts, decide what story your wall will tell. This step matters more than design rules.
Ask yourself:
- Is this about family life?
- A travel journey?
- A specific year or season?
- Everyday moments or big milestones?
Once you know the theme, choosing photos becomes easier and more focused.
Popular photo wall story ideas:
- A growing family timeline
- A single unforgettable trip
- Childhood to present-day moments
- A mix of quiet, everyday memories
Stick to one main story per wall to keep it emotionally clear.
Choose Photos That Flow Together
You don’t need perfect photos. You need connected photos.
Look for images that share:
- Similar lighting
- Matching color tones
- Emotional consistency
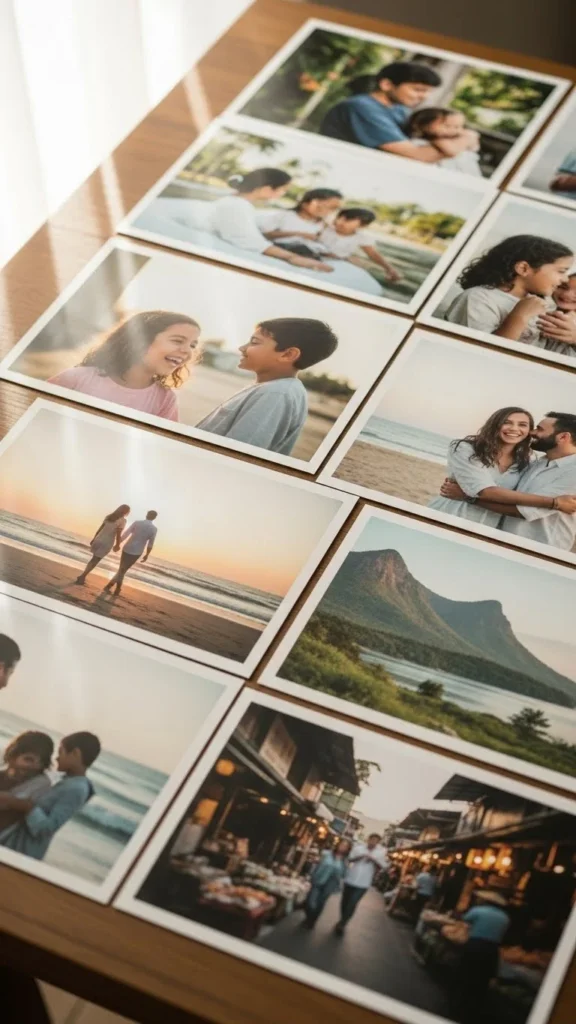
Quick photo selection tips:
- Limit heavy filters
- Mix close-ups and wide shots
- Include candid moments, not just posed ones
Black-and-white photos can also help unify images taken at different times.
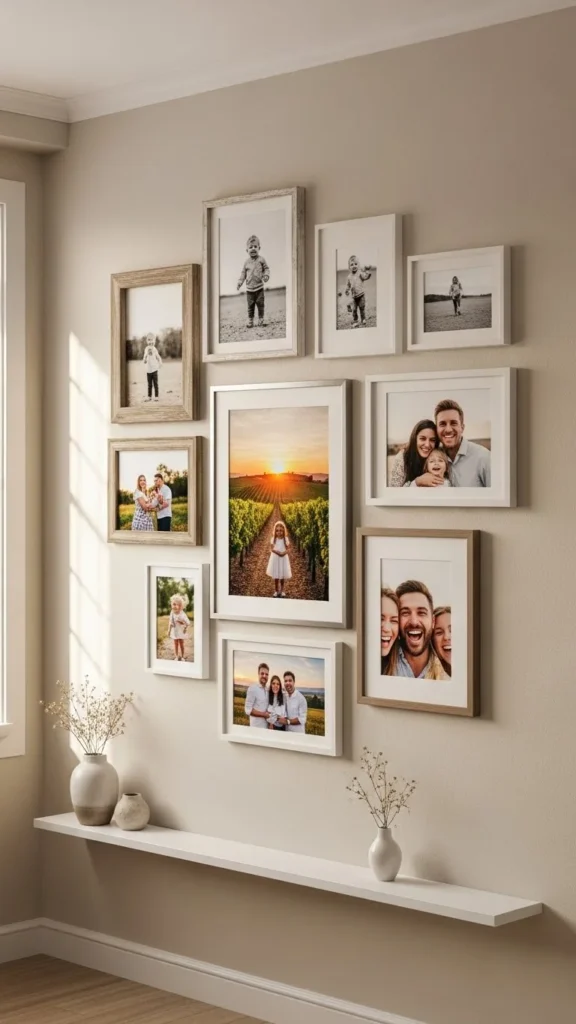
Pick a Layout That Matches the Mood
Your layout sets the rhythm of the story.
Structured Layouts (Clean & Modern)
- Grid layouts
- Symmetrical rows
- Same-size frames
These work well for timelines or formal spaces.
Organic Layouts (Relaxed & Emotional)
- Mixed frame sizes
- Slightly uneven spacing
- Gallery wall style
Organic layouts feel more personal and lived-in, especially for family or memory walls.
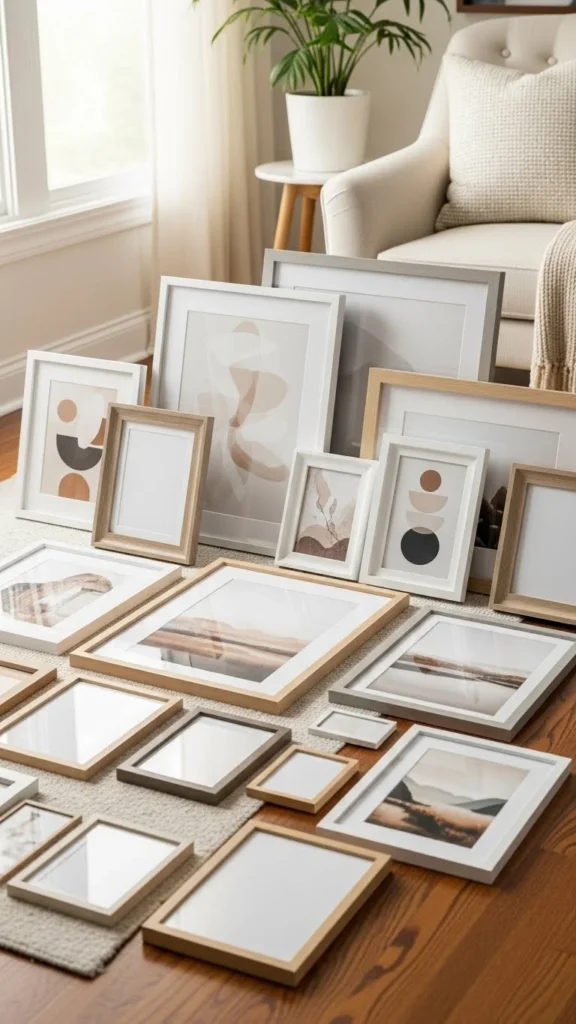
Frame Choices That Don’t Compete With the Photos
Frames should support the story, not steal attention.
Safe frame combinations:
- All black frames for a modern look
- Light wood for warmth
- White frames for airy spaces
- A mix of black + wood for balance
Avoid using too many different frame styles. Two or three max is ideal.
Budget tip:
Use the same frames but vary the mat size for interest.
Arrange Before You Hang Anything
Never start hammering nails without planning first.
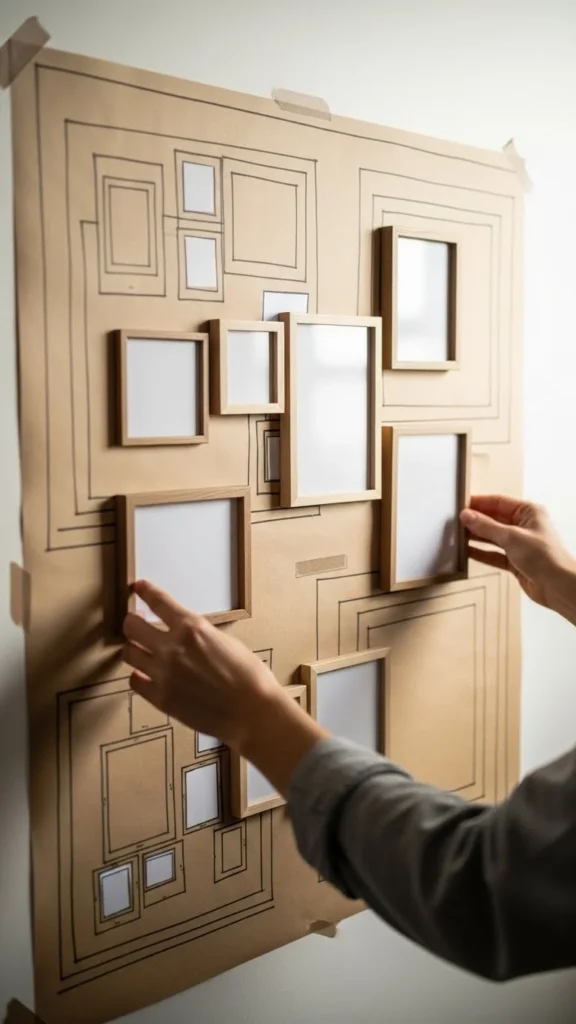
Easy planning methods:
- Lay everything on the floor first
- Trace frames on paper and tape them to the wall
- Take photos of layouts and compare
Step back often. What looks good up close may feel crowded from across the room.
Add Visual Breaks to Enhance the Story
Not every frame needs a photo.
To keep the wall from feeling heavy, mix in:
- Quote prints (minimal text, subtle)
- Empty mats
- Small mirrors
- Line art or sketches
These pauses give the eye rest and help the photos feel more meaningful.
Choose the Right Wall for Your Photo Story
Some walls naturally work better than others.
Great places for story-driven photo walls:
- Staircases
- Hallways
- Above a sofa or console
- Bedroom accent walls
Avoid walls that already feel visually busy. Your photos should be the main focus.
Keep the Story Growing Over Time
A photo wall doesn’t have to be finished forever.
Leave room to:
- Swap photos seasonally
- Add new memories
- Rearrange as life changes
This makes the wall feel alive rather than locked in time.
Common Mistakes to Avoid
If your wall doesn’t feel right, check for these issues:
- Too many unrelated photos
- Inconsistent spacing
- Overly bold frames
- Hanging too high or too low
Aim for eye-level placement and balanced spacing.
Final Takeaway
Decorating walls with photos is about more than design. It’s about capturing moments and letting them live with you every day.
When you choose photos intentionally, plan your layout, and let the story guide you, the result feels personal and timeless.
Save this guide for later and start building your photo story wall today!
Leave a Reply