
There’s something about wood wall art that instantly makes a space feel warm, grounded, and lived-in. It brings that cozy farmhouse charm you see in magazines—without the hefty price tag. The best part? You don’t need advanced tools or woodworking skills to make it yourself.

This guide will walk you through how to DIY wood wall art step by step, using simple materials and beginner-friendly techniques that still look polished and intentional.
Why Wood Wall Art Fits Farmhouse Style So Well
Farmhouse décor is all about natural materials, texture, and simplicity. Wood checks every box.
Why it works:
- Adds warmth and depth to plain walls
- Looks better with age and imperfections
- Works with neutral, rustic, and vintage spaces
- Can be customized to any size or room
Even simple wood pieces can feel high-end when styled thoughtfully.
Choose the Right Type of Wood
The wood you choose sets the tone for the final piece. Don’t overthink this—rustic charm thrives on character.
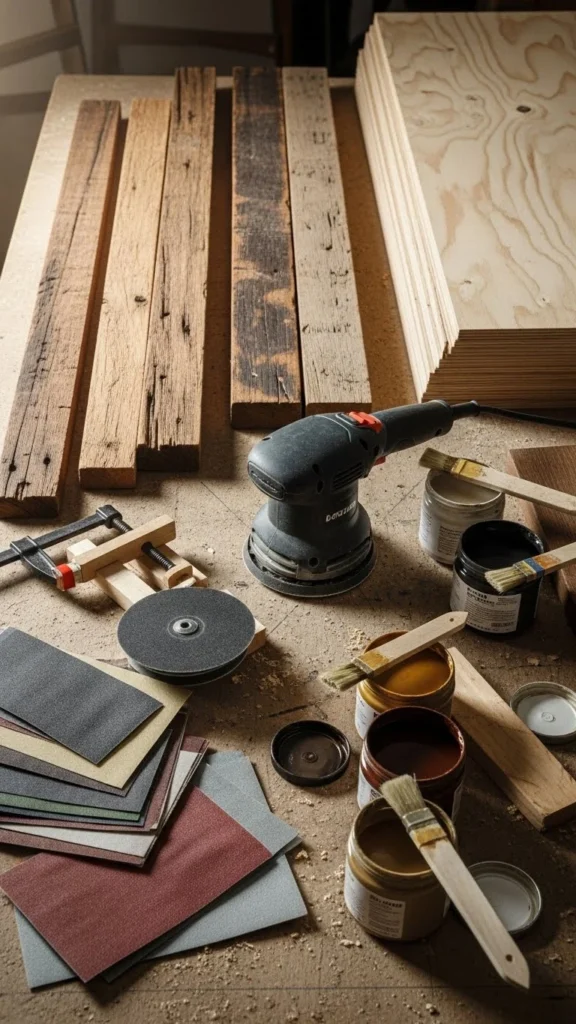
Great wood options:
- Reclaimed wood (old pallets or fence boards)
- Pine boards (budget-friendly and easy to work with)
- Plywood for painted or layered designs
Look for boards with knots, grain variation, or slight imperfections. These details add authenticity.
Pick a Simple Farmhouse-Inspired Design
Simple designs always look more timeless than complicated ones.
Easy DIY ideas:
- Horizontal plank panels
- Herringbone or chevron layouts
- Wood slat squares or rectangles
- Minimal carved or painted patterns
If this is your first project, start with straight planks or geometric layouts. Clean shapes let the wood shine.
Prep the Wood for a Polished Finish
This step makes the difference between “DIY” and “store-bought.”
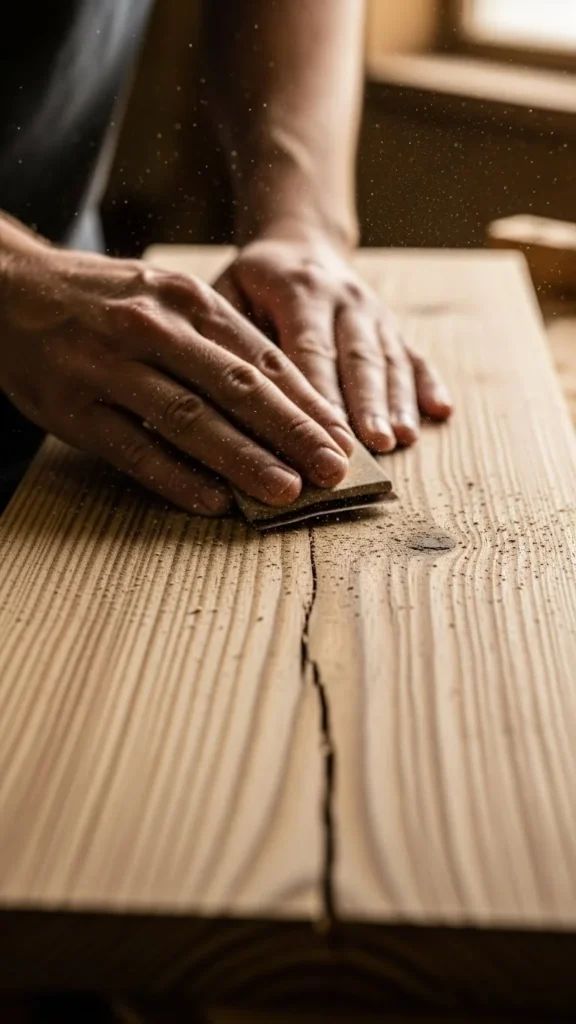
Prep basics:
- Lightly sand rough edges and surfaces
- Wipe off dust with a dry cloth
- Test stain or paint on a scrap piece
Don’t aim for perfection—slight roughness actually enhances farmhouse charm.
Add Color or Stain (Less Is More)
Farmhouse style favors muted, natural tones.
Popular finishes:
- Natural or lightly stained wood
- Whitewashed or gray-washed finishes
- Soft charcoal or matte black accents
Apply stain with a rag or brush, then wipe excess off quickly. This keeps the wood grain visible and natural-looking.
Assemble Your Wood Wall Art
Once everything is dry, it’s time to put it together.
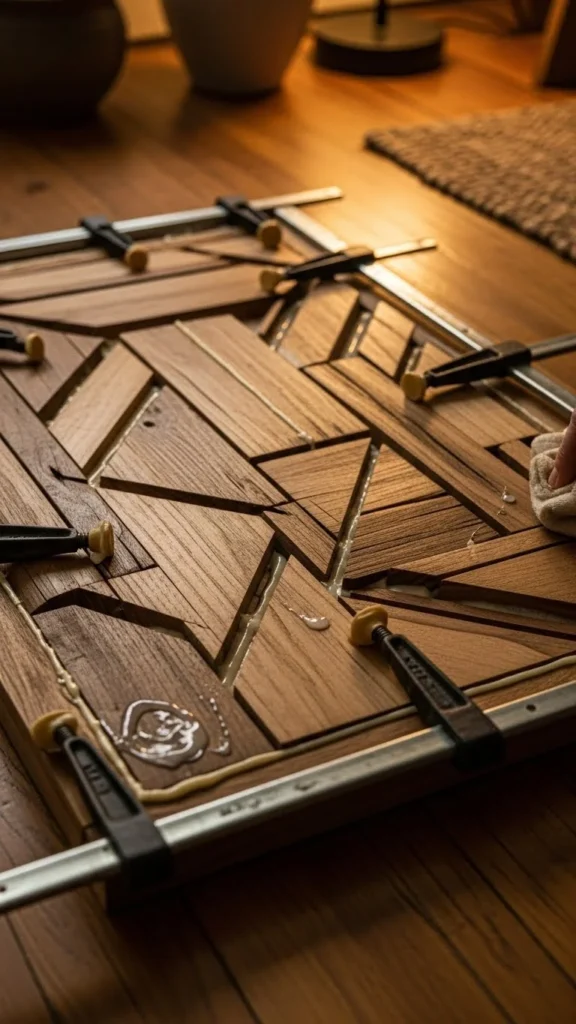
Assembly tips:
- Lay pieces out on the floor first
- Use wood glue for lightweight projects
- Add small nails or screws if extra support is needed
- Check alignment before securing everything
Let the piece dry fully before hanging.
How to Hang Wood Wall Art Securely
Wood art is heavier than canvas or prints, so hanging it properly matters.
Safe hanging options:
- D-ring hangers on the back
- Sawtooth hangers for smaller pieces
- Anchors for large or heavy designs
Always measure and center your piece carefully—it instantly makes the space feel more intentional.
Style It Like a Farmhouse Pro
The way you style your wood art matters just as much as how you build it.
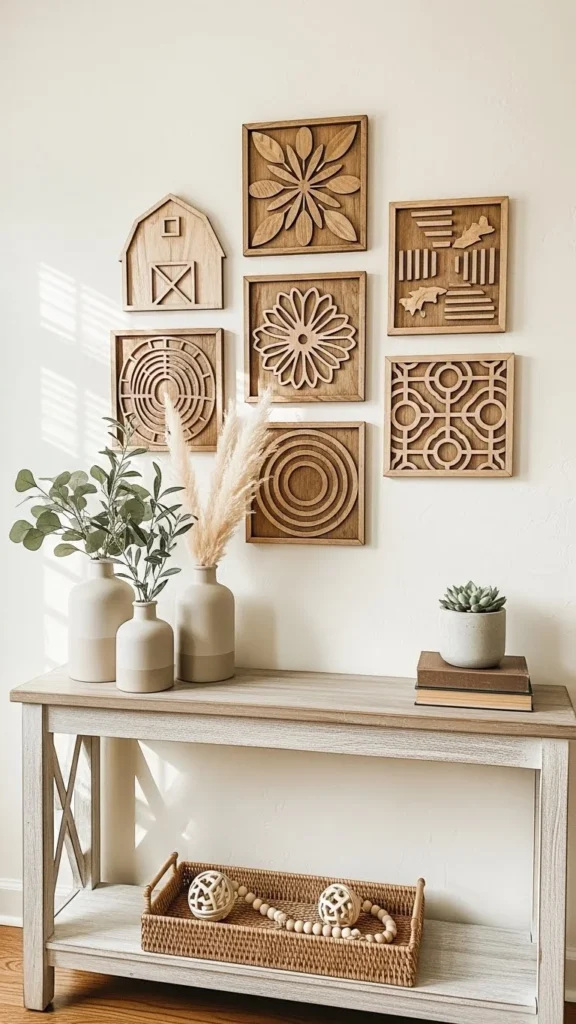
Styling ideas:
- Pair with greenery or dried florals
- Keep surrounding décor neutral
- Let the wood be the focal point
Avoid overcrowding. Farmhouse style breathes best with space.
Easy Variations to Try Next
Once you’ve made one piece, you’ll want to make more.
Try next:
- Layered wood art with depth
- Mixed wood and metal accents
- Seasonal wood art you can swap out
Each project gets easier—and more fun.
Final Takeaway
DIY wood wall art is one of the most satisfying ways to add rustic farmhouse charm to your home. With simple materials, thoughtful prep, and a restrained design, you can create something that looks handcrafted and high-end.
🤎 Save this DIY for later and try making your own wood wall art this weekend—you’ll love the cozy character it brings.

Leave a Reply